
 Mylar Bags
 Custom Labels
 Custom Sticker
Printing on cardstock looks intimidating — thicker paper, fussy printer trays, the fear of a jam right before the wedding invites are due. It’s actually simple once you know the four things that matter: the right cardstock weight, the right printer setting, the right tray, and a single test print before you commit.
This guide walks you through it visually, step by step, plus a comparison table of printers that genuinely handle cardstock well in 2026.
Quick answer: Most home inkjet and laser printers can print on cardstock up to 80–110 lb (216–300 gsm). Load one sheet at a time into the rear or manual-feed tray, set paper type to Cardstock or Heavyweight, and run a test print on plain paper first. Full walkthrough below.
What Is Cardstock Paper?
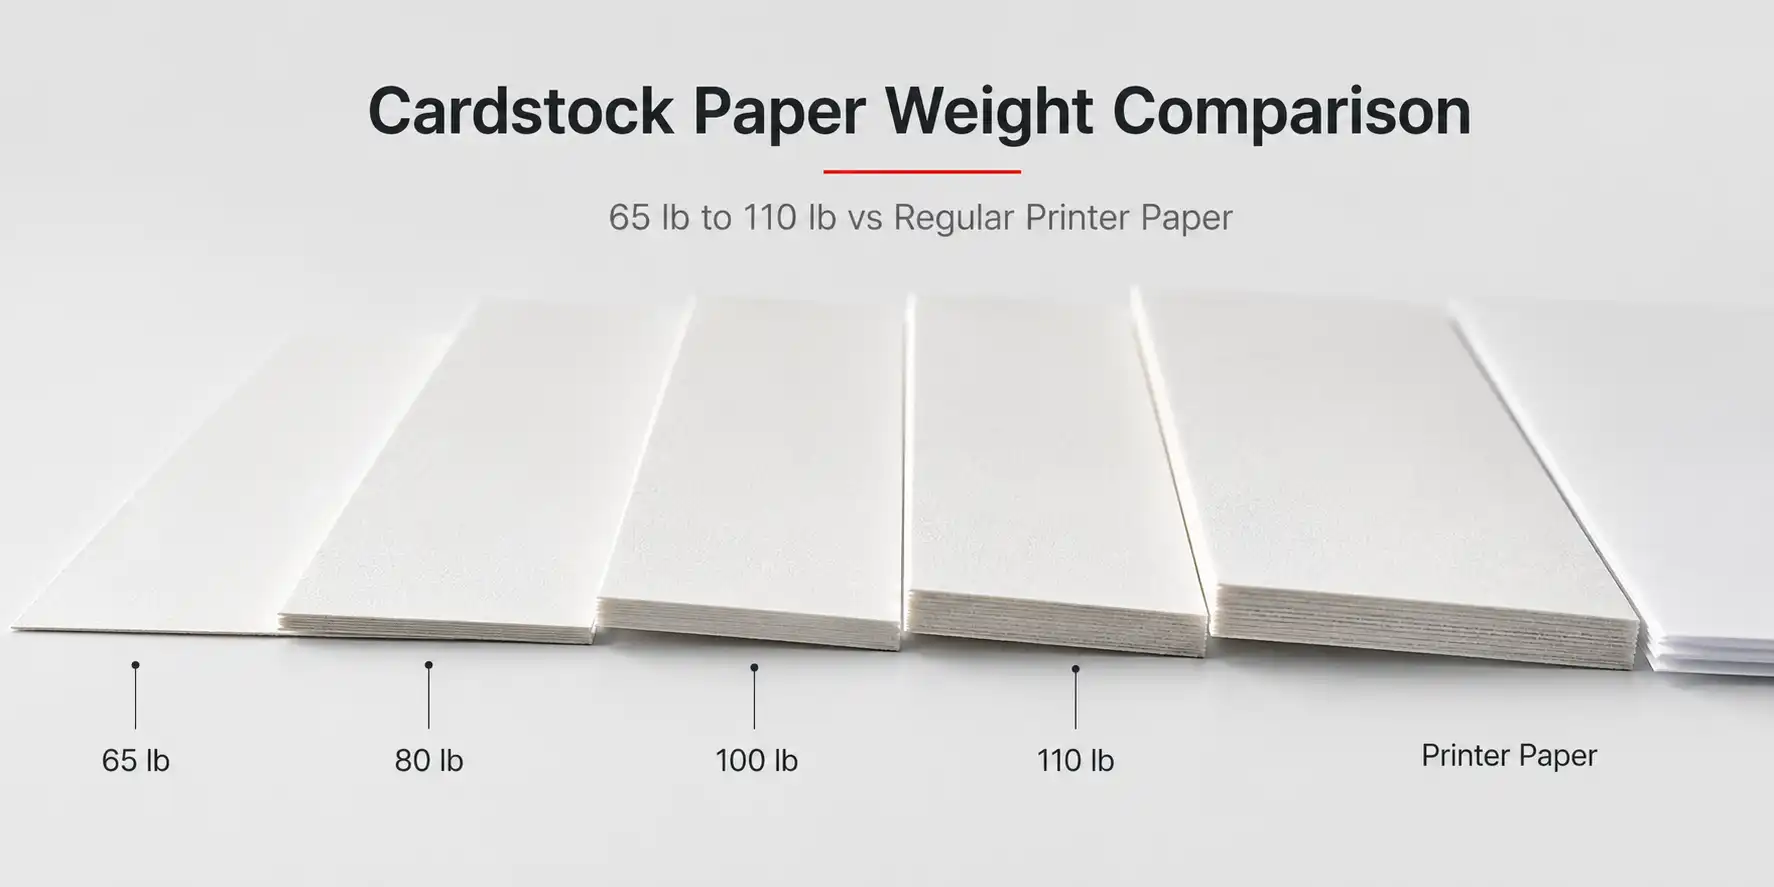
Cardstock is a thicker, sturdier paper that sits between regular printer paper (around 20 lb) and thin cardboard. It’s measured by weight — the higher the number, the heavier and more premium it feels.
| Cardstock Weight | Feels Like | Best For |
|---|---|---|
| 65 lb (176 gsm) | Light cardstock | Flyers, simple invitations, scrapbooking |
| 80 lb (216 gsm) | Standard cardstock | Greeting cards, postcards, menus |
| 100 lb (271 gsm) | Premium cardstock | Wedding invitations, business cards |
| 110 lb (300 gsm) | Heavy cardstock | Luxury invites, packaging inserts, tags |
Finishes range from matte (no glare, easy to write on), to glossy (vibrant photos, may smudge with inkjet), to textured (linen, felt, or laid finishes for a premium feel).
How to Print on Cardstock in 6 Steps
Here’s the full visual walkthrough. Each step has a screenshot/photo placeholder — adding these to the post is what will turn image-search impressions into clicks.
Step 1 — Check Your Printer Can Handle It
Before anything else, confirm your printer is rated for the cardstock weight you bought. Open your printer’s manual (or search “[your model] supported paper weight”) and look for a number in gsm or lb.
- Most modern inkjets handle up to 300 gsm / 110 lb
- Most home laser printers handle up to 220 gsm / 80 lb
- If your cardstock exceeds the printer’s max, you’ll get jams — no setting will fix that
Step 2 — Pick the Right Cardstock for the Job
Match the weight to the project, not the other way around:
- Wedding invites, business cards: 100–110 lb, matte or textured
- Christmas cards, birthday cards: 80–100 lb, matte or glossy
- Postcards, menus, flyers: 65–80 lb, matte
- Photos on cardstock: glossy finish + inkjet (laser toner doesn’t bond well to glossy)
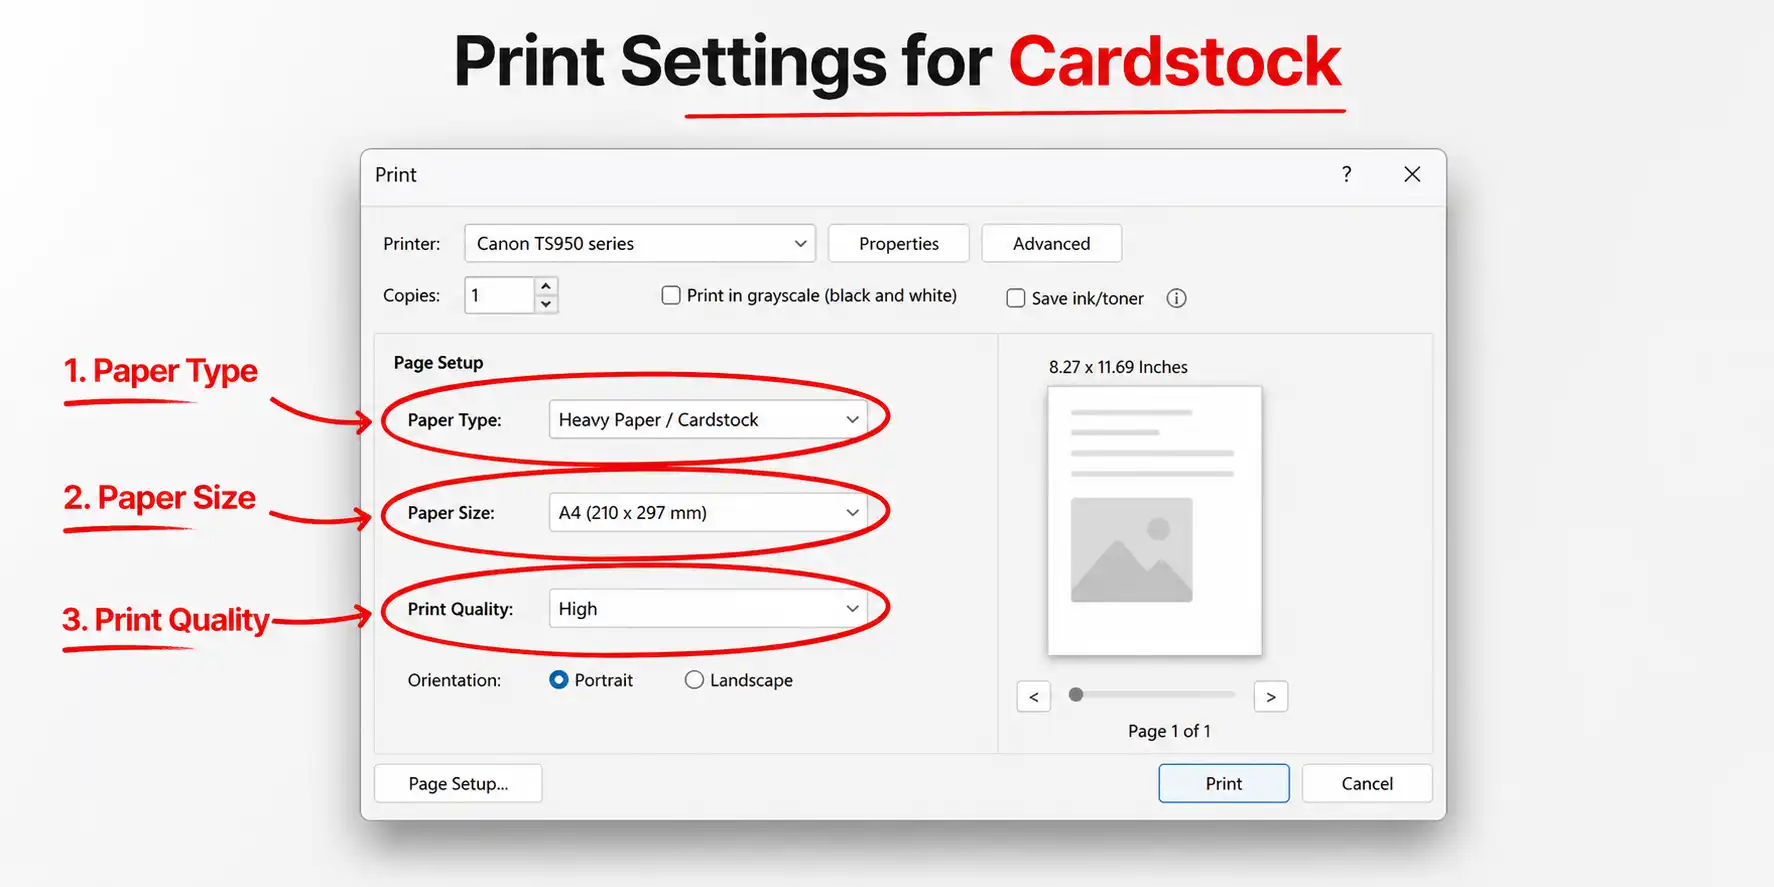
Step 3 — Adjust Your Printer Settings
This is the step most people skip — and it’s the one that prevents 90% of jams and smudging.
In the print dialog, change these three settings:
- Paper type: Cardstock, Heavyweight, or Thick Paper (exact name varies by brand)
- Paper size: Match your cardstock dimensions exactly (Letter, A4, 5×7, etc.)
- Print quality: Best or High — cardstock deserves the higher dpi pass
Step 4 — Load the Cardstock Correctly
This is where most jams happen. Two rules:
- Use the rear or manual-feed tray if your printer has one. The straighter paper path puts less stress on thick sheets.
- Load one sheet at a time for cardstock above 100 lb. Yes, it’s slower. It also works.
Fan the stack before loading to separate sheets, and make sure the print side faces the correct direction (most cardstock is single-sided — check the wrapper).

Step 5 — Run a Test Print on Plain Paper
Don’t waste a sheet of $1 cardstock proving your alignment is off. Print the design on regular paper first and check:
- Margins aren’t cutting off important content
- Colors look the way you expect (especially for skin tones and brand colors)
- Text is sharp at the size you’re using
- Bleeds extend correctly if your design runs to the edge
For designs running to the edge of the paper, build in a 3 mm bleed and keep critical text at least 5 mm inside the trim line.
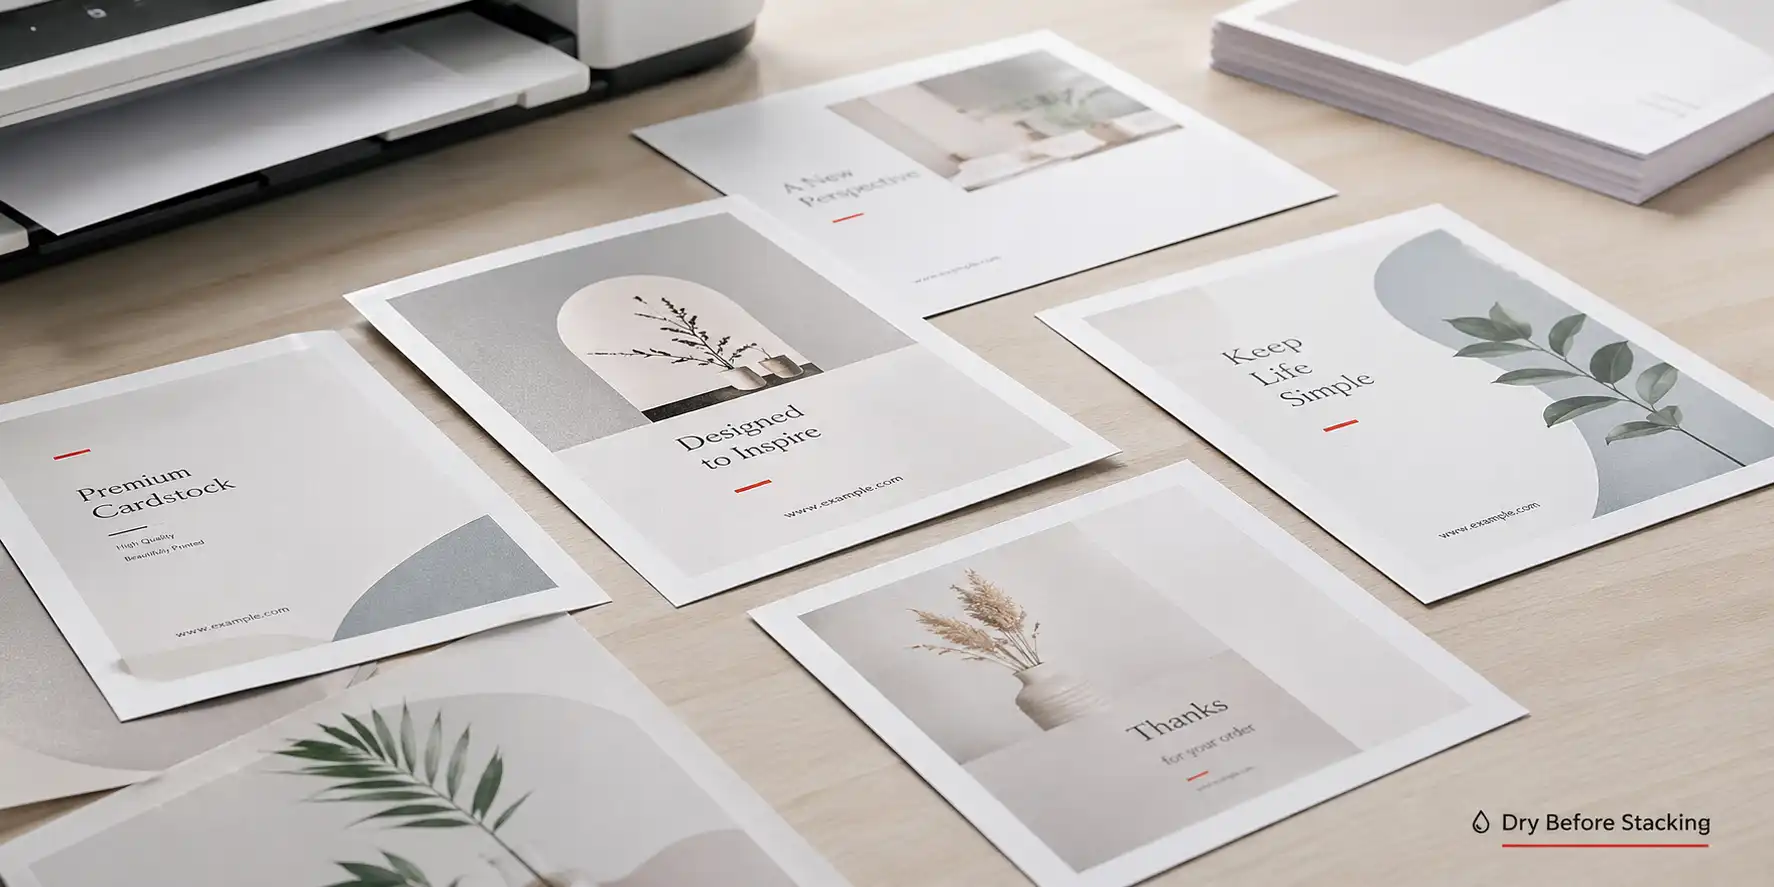
Step 6 — Print, Then Let It Dry
Print one sheet at a time for cardstock above 100 lb. After printing:
- Inkjet: let each sheet sit flat for 30–60 seconds before stacking. Glossy cardstock can need 2–3 minutes.
- Laser: essentially dry as it exits, but warm — let it cool to avoid finger marks on glossy finishes.
- Double-sided? Wait until the first side is fully dry before flipping. For inkjet on heavy cardstock, that can mean 5+ minutes.
Best Printers for Cardstock in 2026
If you print cardstock often — for a small business, an Etsy shop, or regular events — the right printer pays for itself in saved jams and reprints. These are the models that handle thick paper reliably:
| Printer | Type | Max Paper Weight | Rear/Manual Feed | Best For | Approx. Price |
|---|---|---|---|---|---|
| Canon PIXMA TS9120 | Inkjet | 300 gsm (110 lb) | Yes (rear) | Photos, invitations, glossy cardstock | $180 |
| Epson EcoTank ET-2850 | Inkjet | 256 gsm (95 lb) | Yes (rear) | High-volume color cardstock, low ink cost | $300 |
| HP OfficeJet Pro 9015e | Inkjet | 280 gsm (105 lb) | Yes (rear) | Small business, mixed paper types | $230 |
| Brother HL-L3270CDW | Laser (color) | 220 gsm (80 lb) | Yes (manual) | Crisp text on matte cardstock | $330 |
| Canon Color imageCLASS LBP622Cdw | Laser (color) | 200 gsm (75 lb) | Yes (manual) | Business cards, professional flyers | $250 |
| HP LaserJet Pro M404dn | Laser (mono) | 199 gsm (75 lb) | Yes (manual) | Black-text invites, RSVPs | $270 |
Inkjet vs. laser — quick rule:
- Choose inkjet if you print photos, glossy finishes, or want vibrant color on textured cardstock.
- Choose laser if you print mostly text, want sharp results without smudging, and stick to matte or smooth finishes.
Troubleshooting Common Cardstock Printing Problems
The cardstock keeps jammingSwitch to the rear or manual-feed tray, load one sheet at a time, and confirm your cardstock weight doesn’t exceed the printer’s max gsm rating.
Ink is smudgingYou’re either not waiting long enough for it to dry, or your inkjet ink isn’t compatible with a glossy finish. Switch to matte cardstock or a pigment-based ink.
Colors look washed outBump print quality to Best, confirm paper type is set to Cardstock (not Plain), and check that your design is at least 300 dpi.
Text is misaligned or cut offRun a test print on plain paper, check your margins (especially with bleeds), and verify the paper size in the print dialog matches your cardstock.
Toner is flaking off (laser)Laser toner doesn’t bond well to glossy or coated cardstock. Use matte or uncoated cardstock with laser printers.
Frequently Asked Questions
Can I print cardstock on a regular home printer?
Yes, as long as your printer supports the cardstock weight (check the manual for the max gsm or lb rating). Most home inkjets handle up to 110 lb; most home lasers handle up to 80 lb.
What’s the best printer setting for cardstock?
Set paper type to Cardstock or Heavyweight, paper size to match your sheet dimensions, and print quality to Best or High. Use the rear or manual-feed tray if available.
Does my HP printer print on cardstock?
Most HP inkjet and laser printers from the last few years support cardstock up to 100–110 lb. Search your model number plus “supported paper weight” or check the manual to confirm.
Inkjet or laser — which is better for cardstock?
Inkjet is more versatile and handles glossy, textured, and photo cardstock better. Laser produces sharper text and doesn’t smudge but struggles with glossy finishes. For invitations and crafts, inkjet usually wins. For business cards and text-heavy prints, laser wins.
What weight of cardstock should I use?
65–80 lb for flyers and postcards. 80–100 lb for greeting cards. 100–110 lb for wedding invitations and business cards. Heavier feels more premium but is harder on home printers.
Can I print double-sided on cardstock?
Yes, but disable automatic duplexing for cardstock above 80 lb — the printer’s duplex unit isn’t built for thick paper. Print one side, let it dry, flip manually, and print the second side.
Final Thoughts
Printing on cardstock is mostly about preparation: pick the right weight for the project, set the paper type correctly, feed sheets one at a time, and always test on plain paper first. Get those four things right and you’ll get clean, professional prints whether you’re making 20 wedding invites or 200 business cards.
If you’re producing cardstock prints regularly for a brand or product line, custom printed cardstock packaging can take it a step further — same paper, professionally finished, at scale.
Related Article
The Future of Printing on Corrugated Boxes
Types & Tips on Perforated Paper for Printing
What Does Collate Mean When Printing?